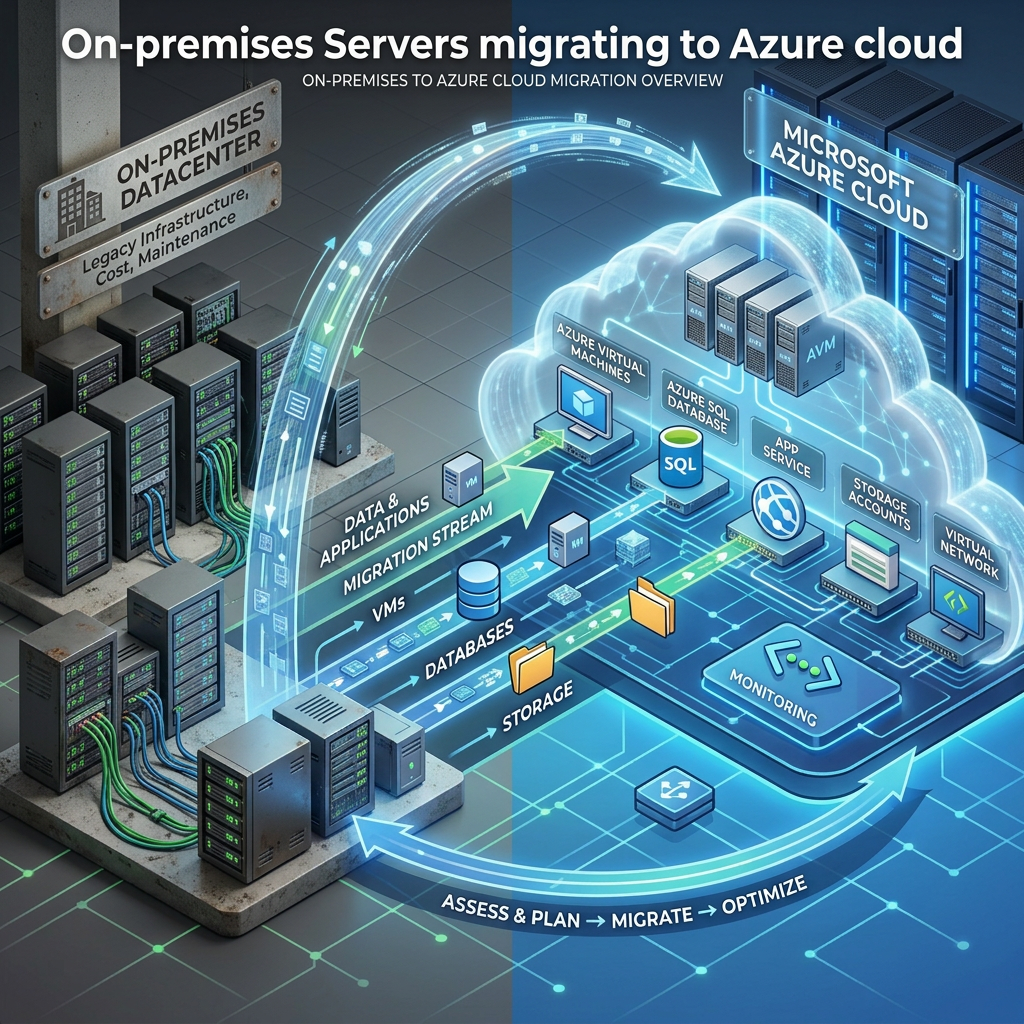
Migrating On-Premises Hyper-V Virtual Machines to Microsoft Azure
A practical guide to discovering, assessing, replicating, testing, and migrating Hyper-V workloads to Azure, including best practices, common mistakes, and lessons learned from the field.
Migrating an on-premises virtual machine from Hyper-V to Microsoft Azure can appear straightforward when the process is reduced to a few portal steps. Discover the server, assess it, enable replication, run a test migration, and complete the production cutover.
In real-world migrations, however, moving the virtual disks is usually the easy part. The harder work involves understanding application dependencies, preparing networking and DNS, selecting the correct Azure VM and disk sizes, validating security controls, and making sure the workload can be monitored, protected, patched, and supported after the move.
I have found that the strongest migration projects treat the virtual machine as part of a larger business workload. The server may depend on databases, domain controllers, file shares, licensing services, firewall rules, scheduled tasks, service accounts, and external integrations that are not immediately visible in the Hyper-V console.
This article walks through the complete Hyper-V-to-Azure migration process using Azure Migrate and includes the practical details that can help avoid problems during the maintenance window.
What Is Azure Migrate?
Azure Migrate is Microsoft’s centralized platform for discovering, assessing, and migrating on-premises servers, applications, databases, and virtual desktop workloads into Azure.
For Hyper-V environments, Azure Migrate can inventory virtual machines, collect performance information, evaluate Azure readiness, recommend Azure VM sizes, estimate cost, replicate virtual disks, create isolated test migrations, and perform the final production cutover.
The Hyper-V to Azure Migration Process
How Hyper-V Replication to Azure Works
Azure Migrate uses replication components installed on the Hyper-V hosts or failover cluster nodes. This provides an agentless migration experience for the guest virtual machines because migration software normally does not need to be installed inside every VM.
During initial replication, Azure Migrate copies the selected virtual disks to Azure. While the first copy is running, new disk changes are tracked on the Hyper-V side. After the initial synchronization is complete, Azure Migrate transfers only the changed blocks until the final migration.
Do not monitor only the Azure portal. Also monitor Hyper-V host storage, replication logs, outbound bandwidth, proxy health, firewall behavior, and source workload performance.
Plan the Migration Around the Application
A migration should be organized around applications and business services, not only around individual virtual machines. A three-tier application may include web, application, and database servers located on different Hyper-V hosts, but those systems still need to be evaluated and migrated as one workload.
Before enabling replication, identify the business owner, application owner, technical owner, maintenance window, acceptable downtime, rollback requirements, validation process, and support team.
Questions to Answer Before Starting
- Who owns the application?
- Who can validate the application after migration?
- How much downtime can the business tolerate?
- How much data loss would be acceptable during rollback?
- Which servers, databases, file shares, APIs, and services depend on the workload?
- Will the Azure VM need to communicate with systems that remain on-premises?
- Will DNS records, firewall rules, routes, certificates, or licensing change?
- How will the workload be backed up, monitored, patched, and secured in Azure?
Do not wait until cutover night to determine who will test the application. Identify the tester, validation steps, expected results, and acceptance criteria before the migration begins.
Prepare the Azure Landing Zone
The target Azure environment should be ready before the first production workload is replicated. Creating a VNet and subnet is only the beginning.
- Create or select the correct Azure subscription.
- Confirm the target Azure region.
- Prepare the target virtual network and subnets.
- Configure VPN or ExpressRoute connectivity when hybrid communication is required.
- Configure route tables, Network Security Groups, and firewall rules.
- Validate DNS resolution between Azure and on-premises.
- Confirm regional VM availability and subscription quotas.
- Define availability zones, availability sets, or another resiliency model.
- Apply naming standards, tags, role-based access control, Azure Policy, and resource locks.
- Plan backup, monitoring, security, patching, and operational ownership.
Step 1: Create the Azure Migrate Project
In the Azure portal, search for Azure Migrate and create a project in the subscription and region selected for the migration. Use a dedicated resource group so migration resources, permissions, billing, and cleanup remain organized.
Select the discovery and assessment capability for servers, databases, and web applications, and choose Hyper-V as the source environment.
Step 2: Deploy the Azure Migrate Appliance
Download the Hyper-V appliance package from Azure Migrate, deploy it in the on-premises environment, complete the appliance configuration, and register it with the Azure Migrate project.
The appliance requires network access to the Hyper-V hosts and outbound connectivity to Azure. Use a dedicated service account with only the permissions required for discovery.
Use a dedicated appliance, restrict administrative access, keep the operating system patched, and avoid installing unrelated software on it.
Step 3: Discover the Hyper-V Environment
Add the Hyper-V hosts or cluster nodes to the appliance using an account with the required permissions. After discovery begins, verify that every expected host and VM appears in the Azure Migrate project.
Do not ignore incomplete discovery. Missing disk, operating system, or performance information can create inaccurate readiness and sizing results.
Collect Representative Performance Data
A short performance collection window can produce misleading recommendations. Collect information during normal operations and include known peak periods, backup windows, scheduled jobs, batch processing, month-end activity, and maintenance events.
Step 4: Assess Azure Readiness and Cost
Create an Azure VM assessment and select the target region, sizing method, performance history, utilization percentile, comfort factor, pricing assumptions, licensing benefits, and storage options.
Treat the Azure Migrate recommendation as a starting point. Validate it against peak utilization, disk latency, IOPS, throughput, network limits, application requirements, and regional VM availability.
Step 5: Install the Hyper-V Replication Provider
Download the Hyper-V replication provider and registration key from Azure Migrate. Install the provider on each standalone Hyper-V host or on every failover cluster node that can own the migrating VM.
In a clustered environment, installing the provider only on the node currently running the VM can create problems if the workload moves to another node.
Do not assume the VM will remain on the same cluster node throughout the migration. Install and validate the provider on every possible owner.
Step 6: Configure VM Replication
Select the Hyper-V virtual machines to replicate and configure the Azure target settings.
Review Each Target Setting Carefully
- Target subscription
- Azure region
- Resource group
- Virtual network and subnet
- Azure VM security type
- Availability zone or availability set
- VM size
- Operating system disk
- Managed disk type
- Disk encryption
- Azure Hybrid Benefit
- Resource tags
Select the Correct Azure Disk Type
| Disk Type | Typical Use | Migration Consideration |
|---|---|---|
| Standard HDD | Low-use and noncritical workloads | Lowest cost, but normally unsuitable for performance-sensitive production systems. |
| Standard SSD | General-purpose workloads | A good balance for many low-to-moderate I/O servers. |
| Premium SSD | Production applications and databases | Validate disk-level and VM-level IOPS and throughput limits. |
| Premium SSD v2 | Workloads requiring configurable performance | Confirm region, VM, feature, and deployment support. |
| Ultra Disk | High-performance data workloads | Requires careful compatibility, availability, and resiliency planning. |
Never select a disk tier based only on capacity. A one-terabyte disk does not tell you whether the workload needs 300 IOPS or 20,000 IOPS.
Step 7: Monitor Initial and Delta Replication
Initial replication may take hours or days depending on the amount of data, available upload bandwidth, disk activity, and the number of VMs replicating at the same time.
After the first synchronization is complete, Azure Migrate sends incremental disk changes. High-change workloads such as databases and busy file servers may continue generating significant replication traffic.
Replication Health Checks
- Initial replication progresses without repeated retries.
- The Hyper-V host maintains adequate free disk space.
- Replication traffic does not overwhelm the business network.
- Every required disk is included.
- The operating system disk is correctly identified.
- The target subnet has sufficient IP-address capacity.
- The target VM size is available and within subscription quota.
- Delta synchronization remains within the required migration window.
Step 8: Run a Test Migration
After replication is healthy, perform a test migration into an isolated Azure VNet or subnet. The source VM remains online, replication continues, and Azure creates a temporary VM from the replicated data.
The test network should prevent the cloned VM from communicating with production services unless a controlled connection is required for validation.
Infrastructure Validation
- The VM boots successfully.
- All expected disks are online.
- Network interfaces and routes are correct.
- Windows activation is valid.
- Time synchronization is correct.
- Required services start.
- Event logs do not show critical boot, driver, or storage errors.
Application Validation
- Users can authenticate.
- Application pages and interfaces load.
- Database connections work.
- Service accounts function correctly.
- File paths and shares resolve.
- External integrations are available.
- Application performance is acceptable.
Do not connect a cloned test VM directly to the production network without an approved test design. It may register duplicate DNS records, execute scheduled jobs, send email, connect to production databases, or create split-brain conditions.
A successful Remote Desktop connection proves only that Windows is reachable. It does not prove that the business application is working. The application owner should execute written test cases and approve the results.
Step 9: Complete the Production Cutover
Before the maintenance window begins, confirm replication health, lower DNS TTL values when required, pause scheduled jobs and integrations, validate backups, confirm Azure quota and capacity, and make sure both the technical and business validation teams are available.
Recommended Cutover Sequence
- Place the application in maintenance mode.
- Stop user activity, scheduled jobs, and external integrations.
- Initiate a planned migration.
- Allow Azure Migrate to shut down the source VM.
- Synchronize final disk changes.
- Create and start the production Azure VM.
- Validate the operating system, disks, networking, services, and application.
- Update DNS, load balancers, firewall rules, routes, and monitoring.
- Obtain application-owner and business-owner acceptance.
- Complete the migration in Azure Migrate.
Keep the original Hyper-V VM powered off during the agreed rollback period. Do not delete it until the application has been accepted, backups have been validated, and the decommission plan has been approved.
Post-Migration Tasks
The migration is not complete simply because the VM is running in Azure. The workload must be integrated into the organization’s Azure operational model.
Protect the Workload
- Enable Azure Backup.
- Validate the backup policy and retention settings.
- Perform a restore test.
- Evaluate Azure Site Recovery when regional disaster recovery is required.
Monitor the Workload
- Enable Azure Monitor and Log Analytics.
- Configure VM Insights when appropriate.
- Create meaningful CPU, memory, disk, availability, and application alerts.
- Connect alerts to the organization’s incident-management process.
Secure the Workload
- Review Network Security Groups and firewall rules.
- Review Microsoft Defender for Cloud recommendations.
- Use private management connectivity or Azure Bastion.
- Apply least-privilege role assignments.
- Validate disk encryption and endpoint security.
Optimize the Workload
- Review VM utilization after the workload stabilizes.
- Review managed disk performance and cost.
- Apply Azure Hybrid Benefit when eligible.
- Evaluate reservations or savings plans for predictable workloads.
- Remove temporary test resources, disks, network interfaces, and security rules.
Best Practices
- Start with a representative pilot workload.
- Collect performance data over a meaningful period.
- Organize migration waves around applications and dependencies.
- Run a test migration for every production workload.
- Use an isolated network for test migrations.
- Prepare DNS changes before the maintenance window.
- Validate subscription quotas and VM availability.
- Design backup, monitoring, patching, and security before cutover.
- Separate infrastructure validation from application validation.
- Stabilize the workload before making aggressive optimization changes.
- Document every network, security, DNS, and application change.
- Maintain a clear rollback decision point.
What to Avoid
- Do not copy the on-premises VM size into Azure without reviewing actual utilization.
- Do not skip application dependency analysis.
- Do not test cloned servers on the production network without controls.
- Do not assume the server will keep the same IP address.
- Do not use Remote Desktop access as the only application test.
- Do not ignore disk IOPS, throughput, and latency requirements.
- Do not enable production traffic before business validation.
- Do not run the source and Azure copies as active production systems simultaneously.
- Do not delete the source VM immediately after cutover.
- Do not leave the Azure VM without backup, monitoring, or patch management.
Gotchas from the Field
Hard-Coded IP Addresses
Application configuration files, scripts, printers, scanners, monitoring tools, firewall objects, and vendor integrations may still reference the old server address.
Static Guest Network Settings
A Windows guest configured with an on-premises static IP address may boot in Azure without normal network connectivity. Document and prepare the guest network configuration before cutover.
DNS Registration and Caching
Updating a DNS record does not mean every client will use it immediately. Review TTL values, DNS caches, application caches, proxy servers, load balancers, and local hosts files.
Hyper-V Checkpoints
Old checkpoint chains consume storage and increase migration complexity. Review them early and avoid risky merge operations immediately before the migration window.
Dynamic Memory
Azure does not use Hyper-V Dynamic Memory in the same way. Size the Azure VM using actual peak memory demand rather than the Hyper-V startup value.
Generation 1 and Generation 2 Virtual Machines
Boot mode, partition layout, Secure Boot, Trusted Launch, guest operating system support, and driver compatibility should be validated before cutover.
VM and Disk Throughput Limits
Even correctly sized managed disks can be throttled if the selected Azure VM reaches its aggregate storage throughput or IOPS limit.
Endpoint Protection
Antivirus and endpoint detection products can interfere with provider installation, snapshots, replication traffic, or the VM’s new Azure hardware profile.
Scheduled Tasks and Automated Jobs
Test and production clones can run scheduled jobs unless those jobs are explicitly disabled or controlled.
Backup and Monitoring Agents
Legacy agents may continue contacting on-premises platforms after migration. Decide which tools should remain, be reconfigured, or be replaced.
Licensing
Azure Hybrid Benefit may reduce Windows Server and SQL Server licensing costs, but third-party products may have separate per-core, hardware-based, or cloud-specific requirements.
Rollback Is More Than Powering On the Old VM
A complete rollback plan must address DNS, firewall changes, user traffic, data written after cutover, scheduled jobs, and application consistency.
Hyper-V to Azure Migration Checklist
- Business owner and application owner identified
- Technical owner and support team identified
- Application dependencies documented
- Performance data collected
- Azure assessment reviewed
- Azure landing zone prepared
- Connectivity and DNS validated
- Azure quota and capacity confirmed
- Replication provider installed on all required hosts
- Replication health confirmed
- Test migration completed
- Infrastructure testing passed
- Application testing passed
- Backup and rollback plans approved
- DNS and firewall changes documented
- Production cutover completed
- Business acceptance received
- Azure Backup enabled and tested
- Monitoring and alerting enabled
- Security recommendations reviewed
- Documentation and CMDB updated
- Source decommission scheduled
Final Thoughts
Azure Migrate provides a strong platform for discovering, assessing, replicating, testing, and migrating Hyper-V workloads. The tooling removes much of the manual disk-copy work that previously made these migrations difficult.
What the platform cannot automatically understand is every application decision made over the years. It cannot know that an old script contains a hard-coded IP address, that a vendor license is tied to a system identifier, or that users depend on a forgotten firewall rule.
In my experience working with cloud migrations, virtualization, infrastructure modernization, storage, backup, and disaster recovery, the strongest migrations are the ones that involve application owners early and validate the workload before the production cutover.
Backup, monitoring, patching, security, cost ownership, and support processes should be designed before the migration, not added several days after the VM reaches Azure.
The goal is not simply to get the virtual machine running in Azure. The goal is to move the workload without losing control of its performance, security, recoverability, cost, or support model.
Need Help Planning Your Azure Migration?
MB Technology Group LLC helps organizations modernize their infrastructure by planning and executing secure, reliable migrations from Hyper-V to Microsoft Azure using Azure Migrate and Azure Site Recovery.


Leave a Reply